Thursday, October 10, 2013

Mom's Trash to Treasure


Craftiness runs in families! Check out this super adorable buffet table redone by my parents :)

My mom found an old beat up buffet table by the street in our neighborhood with a sign that said FREE. This of course is the best price.

Mom and Rita decided to make it a trash to treasure project and give it to Jared and I as a wedding gift. I'm in love with this table.

They used a peacock blue paint that matched our fiesta ware we're registered for. The color turned out great. The knobs are from Hobby Lobby. It took them a couple of weekends to finish the project. Since the previous owner had squared off the round stands at the bottom, Rita had to cut them off and completely replace them. She used the tops of stair banisters for the stands. You can buy them at home depot.

This is my favorite thing in my new home. The fiesta ware looks amazing on-top of it too. THANKS MOM AND RITA! :) Keep crafting people!


Monday, February 4, 2013

Binary "Happy Birthday" Mug!


My future sister-in-law came into town a couple of weekends ago (YIPPY!) and we both happen to be super crafty so she had a great idea to go to Fired Up! a paint your own pottery store! We were so excited. I really think Lauren's turned out better but that's because I'm a little obsessed with Harry Potter!


So, my fiance, Jared, was getting ready to have a birthday and I decided I wanted to make him something nerdy. Lauren suggested to do something with computers and I instantly thought: BINARY CODE! The official language of computers and geeks ;) I googled, "how do you say happy birthday in binary code?" and this is what I got... binary code. I sure hope it's right!

I painted the outside of the mug green and used the letter writing paints to paint on the ones and zeros,to give it that Matrix look. The inside was painted a coffee color (how fitting). Here's how it turned out... Pretty cool huh!? I even painted a cute heart on the inside.

He absolutely loved it. It's a great idea for a gift and there are many binary translators on google, in case you'd like a different message. I can't tell you how accurate the translators are but he didn't seem to notice a mistake!


 Here is a picture of the birthday cake I made him! The polka dots are just M&Ms. How cute is this! Happy 29th birthday Jared <3

Wine Bottle Myth: BUSTED!

So there I was pinning to my hearts content when I saw the mother of all pins! "How to quickly and easily remove wine labels!" YES!!! I am currently planning a wedding and I'm trying to do the center pieces by myself, with some help from my mother. The plan is to incorporate the 100+ wine bottles I've been hording for the past year. (I didn't drink ALL of those bottles! calm down...) Anyway, I was all about this glorious pin. I couldn't wait to try it out!

 The pin said to put your wine bottles in the oven after you use it. Well I wasn't planning on cooking so I went ahead and turned on the oven. The pin said you should let the bottles sit in there for 10 minutes. It did not state what temperature the oven should be set to. At first I set the oven at 200 degrees.... that did nothing after 10 minutes. So I set the temperature at 300 degrees and here are my results! (Don't get too excited)

Out of 7 wine bottles. only 2 of them came out label free. The two bottles that had easy to remove labels were cheap paper labels.

These 4 wine bottles you see lined up together all had plastic coated paper labels. They were the hardest to remove!!!

The semi-removed bottle only had a plastic label. It was still pretty annoying to work with... I had to scrub to get the excess glue off.

Moral of the story?? If planning on crafting with wine bottles, cheaper wine is better! Maybe not for taste but sometimes you gotta take one for the team! It'll be worth it in the end!
Not to worry follow D.I.Y.ers, I have a solution at the bottom. If you have paper only labels go ahead and try the oven technique BUT for other labels do the following solution!

THE SOLUTION:
What did I ended up doing to solve my wine bottle battle? I filled my kitchen sink up with warm water, added a cap full of Downy Fabric Softener and scrubbed. It took about 30 minutes to soak. And 30 to 60 seconds of scrubbing power per bottle. They turned out great.

Later this year if you're lucky I will reveal what I am going to do with these bottles ;) Aren't you excited!?

Sunday, January 27, 2013

BICYCLE CLOCK!!

This is a simple gift to make for any bicycle enthusiast! My fiance and future brother-in-law love to ride mountain bikes, so for Christmas I made them clocks made from bicycle gears. 

I found the gears on an online bike shop . They weren't too expensive but I did go with a higher quality brand to make sure they would look nice. I believe I spent $14 on each gear. The clock parts I got at our local Michael's craft store for about $5. 

I used a craft glue called E-3000 secure the clock parts to the gear. It isn't a tacky glue so you must set the craft where it won't be easily moved around. Make sure it's sitting on a flat surface. Let it sit for at least 5 hours before trying to pick it up. I let mine sit for about 12 hours just to make sure.

The boys liked their clocks more than the other gifts I gave them and that made me feel GREAT!

I love making things for people and this project was a huge success. You can find gears that are less expensive but I thought this style looked good. 

Here is a picture of my fiance's clock hanging up in his work office. 

TA-DA!

Saturday, January 26, 2013

Greek Paddles! Delta Zeta Delta Zeta you're the only one!

I am an alumna member of the Delta Zeta sorority but I still have a little sister who is quite active in our chapter. I wanted to post the two paddles I have made for her this year! The first one is her traditional paddle and the second one was for her 21st birthday :)

For the pink and green one I used mod podge- the sparkley kind- and green polka dotted scrap book paper. The turtle I got at Michael's but I used some left over Lily Pulitzer paper for the turtle shell. I thought it was a cute girly touch. I also added a bow and cute eye lashes because every delta zeta knows how to keep it classy ;)

This pink and blue paddle was for my little's 21st paddle! I used the same technique on this as I did with the chair I made this summer. I painted the paddle light blue, laid down lace then spray painted the paddle with teal spray paint. I then hot-glued a pink flower and used letter sparkle stickers! It turned out fabulous!

Shout out to all my Delta Zeta sissies <3 

Mini Starburst Mirror $3!

I was perusing pinterest one afternoon and I saw a pin of a large starburst mirror someone hung above their fire place. It was listed as only $25 and I had a great idea! Why not make one on your own for way cheaper. Although my starburst mirror is smaller it works perfect for my office at work.

Materials:
* hot glue gun
* decorative mirror (dollar tree, candle aisle)
* 2 packs of round wooden pencils (dollar tree, school supply aisle)
* piece of sturdy cardboard
* ribbon for hanging- it doesn't matter what color
* silver spray paint, or whatever color you'd like your starburst mirror to be
On the back of the mirror are rubber stoppers. I removed those so they wouldn't get in the way of the pencils. 

Then I began gluing on the pencils. I found it easier to glue one then glue the next one on the opposite side. This helps create a more balanced look when you are done. I kept gluing the pencils until I was done. Once I was done gluing the pencils I cut out a piece of cardboard to reinforce the pencils to stay put.

Helpful Hint: trace the mirror on a piece of cardboard before you start gluing the pencils. This way you will guarantee the piece of card board will be the right size.

Once you are done gluing the cardboard you are ready to spray paint. Make sure you have something to put over the mirror so that you don't get paint on the surface of the mirror. If you do, like I did, you can remove the paint with finger nail polish remover.

Once the paint is dry, hot glue a ribbon on the back. I used a thumb tack to hang it up.

There you go! All done :) I will post a picture of the mirror hanging up in my office so you can see the final project.

Friday, August 10, 2012

Flower Power

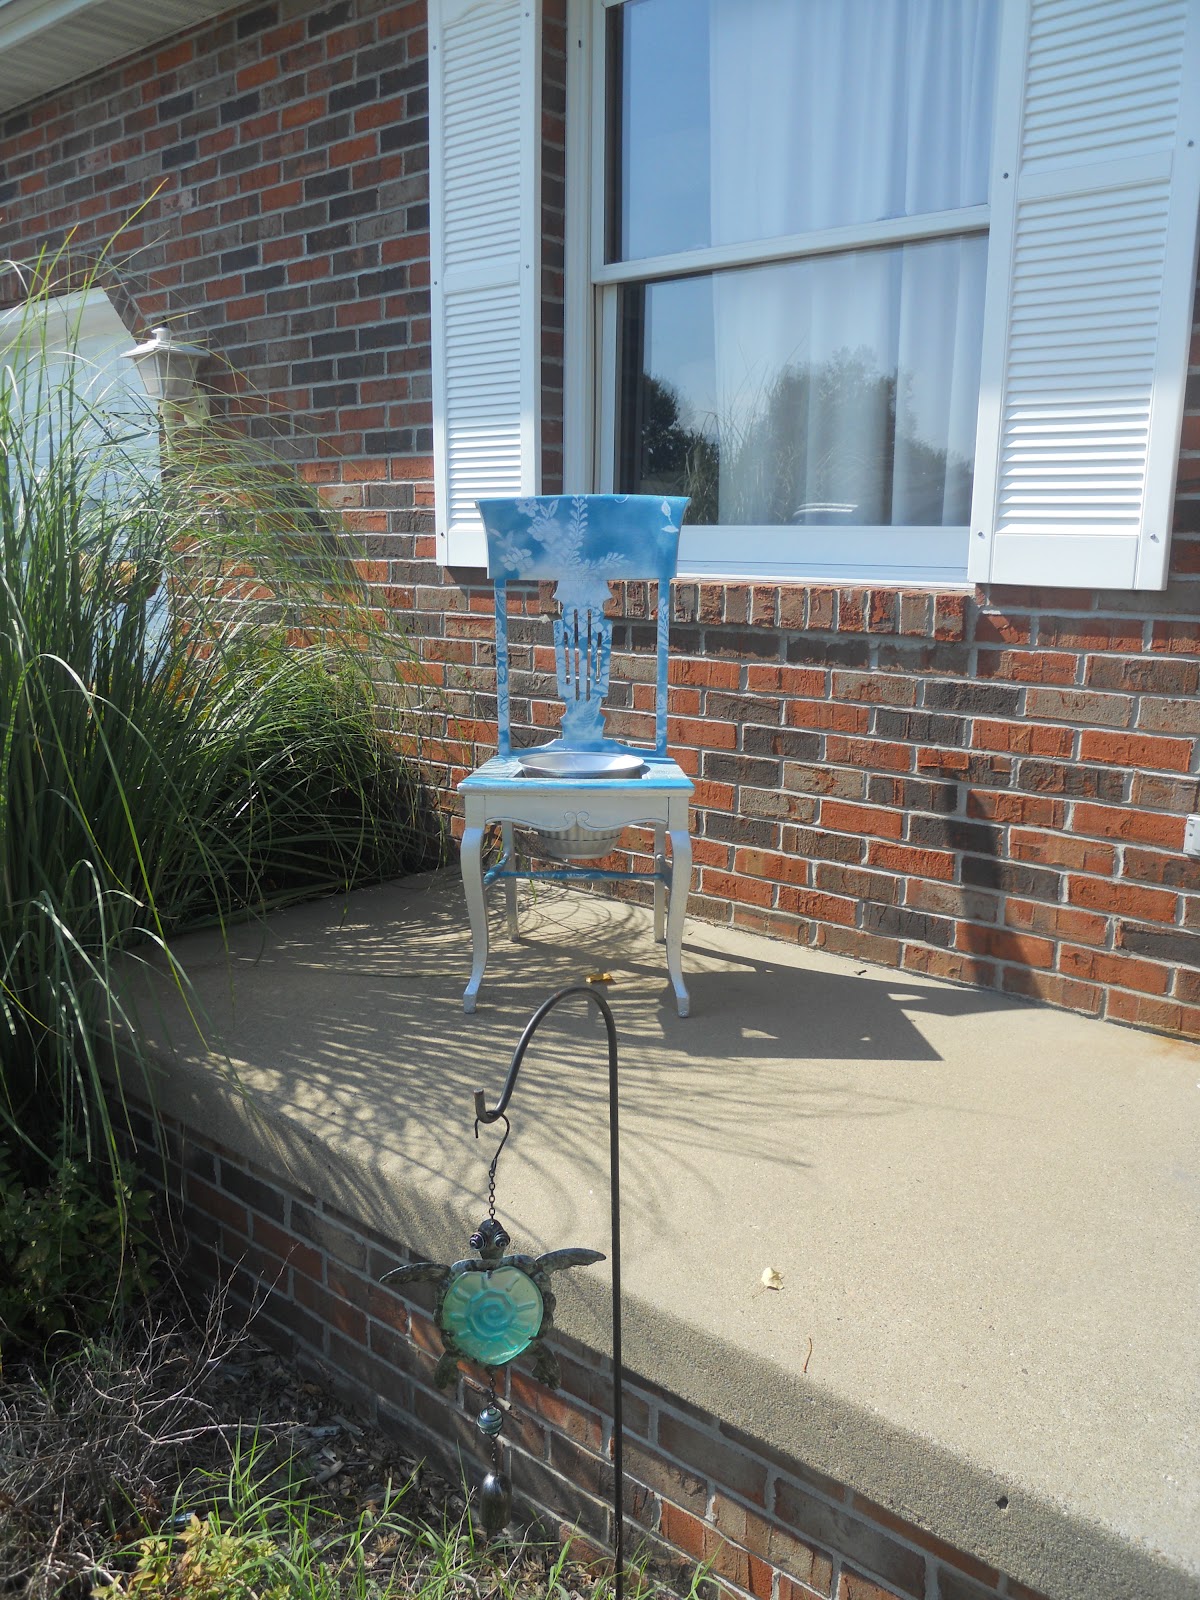
One day while heading home from a a local mountain bike trail I saw an old ugly blue wooden chair sitting outside a house with a "FREE" sign stuck to it. My boyfriend saw me eyeing it so he stopped and we picked it up. I was excited thinking this is going to be an easy project! I had painted a chair when I was in 8th grade in homage to Roy Lichtenstein (my favorite modern artist). How hard could this be? Well 3.5 months later it's finally finished!!!

I had a "before" picture but I accidentally deleted it :( trust me when I say, it was UGLY! The first thing I needed to do was get rid of the nasty upholstery that was left on it. I knew it was an old chair once I saw that it was stuffed with horse hair! The previous owner jammed a 1962 chocolate company magazine underneath the cushion. Why?? I'm not sure but I believe it was a little rickity! 

Next, I needed to remove the excesses nails sticking out. That was a week long project. (BE CAREFUL IF THE NAILS ARE RUSTY!) Always wear eye protection!

Then it was time to strip the paint. I got paint stripper at Lowe's and a metal spatula to scrape the paint off with. It took 4 times to get most of it off. This was some thick paint! Then I sanded it down with an electric sander. That took a lot of muscle and patience.

Once I was content with the blank canvas I rinsed it off with water. Not all of the paint was off but it was good enough that the pray paint would stick. I let it sit for a night to dry. The next day I went to Home Depot to get spray paint.
I love the color teal! Especially on home decor so I got Rust-Oleum brand Satin Lagoon and  Silver Metallic Finish. I also thought since it was going to sit outside I would get a clear coat for protection.

I sprayed my chair with two coats of the silver spray paint first. Make sure the first layer is completely dry before adding the second layer. I let this sit over night.

The next step I was so excited about! I got a yard of lace from Wal-Mart for only $1.00!!! I draped it over the front of the chair and positioned it so I would get the design I would want. Then I sprayed on one layer of Lagoon spray paint. The paint goes through the lace in certain places and is blocked by the flower design. The lace acts as a stencil.

I then tied the lace around the front and positioned it on the back of chair in a nice design layout... ^^^

I spray painted a medium size flower pot I had in the garage and TA-DA! A flower pot chair for your front porch or garden :) I hope you enjoy!